
What's in this verdict
- Before you start
- Step 1: Map your team’s workflow and methodology
- Step 2: List your must-have features
- Step 3: Set a per-user budget
- Step 4: Check the integrations you depend on
- Step 5: Weigh ease of use and team adoption
- Step 6: Run a real pilot with a live project
- Step 7: Check scalability, permissions, support, and data export before committing
- Worked example: a team picks project management software
- Common mistakes when choosing project management software
- Troubleshooting: what to do when it goes wrong
- Your project management software checklist
- How the seven criteria trade off against each other
- When to revisit your project management software choice
- The bottom line
Short answer: Choose project management software from your own workflow outward: map how your team works and which methodology it follows, list the features you truly need, set a per-user budget for the whole team, check integrations, weigh ease of use and adoption, pilot the finalists on a live project, then confirm scalability, permissions, support and data export. The process takes a focused week or two, and the right tool is the one people actually open.
The project management tool you should buy is almost never the one with the biggest name or the longest feature list. It is the one that matches how your team actually works, that the people on the team will open every morning without being nagged, and that fits your budget once you multiply the per-seat price across everyone. Most teams get this backward. They pick a famous tool on a friendly per-user price, spend a weekend configuring elaborate boards, and discover a month later that half the team is back in the group chat and the spreadsheet, that the reporting they wanted sits a tier higher, and that the per-seat bill quietly grew with every new hire. The tool becomes a cost nobody uses.
This verdict is a step-by-step walkthrough that runs the other direction, from your own workflow outward. Over seven steps you will map how your team works and which methodology you follow, list the features you truly need, set a per-user budget grounded in the whole team rather than one seat, check the integrations that keep the tool from becoming an island, weigh ease of use and the adoption it drives, pilot the finalists on a live project, and weigh scalability, permissions, support, and data export before you decide. It builds on our project management cost verdict for the pricing, our true-cost verdict for the money method, and our software trial walkthrough for the pilot. Keep the true-cost calculator and the companion on this page open as you read, and price your own choice as you go.
Key takeaways
- Choose from your own workflow outward, not from a vendor feature list inward. The right tool matches how your team already thinks, in boards, lists, sprints, or timelines, rather than a feature set that demos well and sits unused.
- Price the whole team, not one seat. Per-user pricing scales with every hire, and onboarding, add-ons, and guest seats sit outside the sticker, so always confirm the vendor's current pricing directly.
- Weigh adoption as heavily as capability. A powerful tool the team abandons is pure cost, while a simpler tool people actually open earns its price every day.
- Run a real pilot on a live project, with the people who will use it daily, before you commit to any annual plan.
- The whole seven-step process takes a focused week or two, and it costs far less than a year on a tool the team quietly stopped opening.
Before you start
Choosing project management software well is mostly preparation, and the preparation is cheap. Before you open a single pricing page or start a single pilot, gather three things about how your team actually works. They take an afternoon to write down and they change every decision that follows.
First, your team size and shape: how many people need to work in the tool, who leads projects, who only needs to see or comment, and whether you have contractors or clients who need limited access. This drives cost directly, because almost every tool prices per seat. Second, your workflow and methodology: whether your team runs in agile sprints, moves cards across a kanban board in a continuous flow, or delivers scheduled, phase-gated work that needs timelines and dependencies. Most teams are a blend, so write down what your work actually looks like week to week rather than the label you think you should use. Third, your existing tools: the chat app, document store, calendar, and any specialist tools your team lives in already, because a project tool that does not connect to those becomes an island your team stops visiting.
Time and difficulty: expect a focused week or two end to end, most of it spent running a real pilot rather than reading. The thinking is not hard, but it is easy to skip, and skipping it is how teams end up with a tool that impresses the buyer and loses the users. Write these three inputs down now, enter your team size, per-seat price, and methodology into the companion on this page, and let the rest of this walkthrough turn them into a decision.
Step 1: Map your team’s workflow and methodology
Before you look at any product, describe how your team actually works, in plain language, and name the methodology underneath it. Watch a normal week and write down the path a piece of work takes from idea to done: who raises it, who assigns it, what stages it passes through, where it waits, and how you know it is finished. Then name the shape of that flow. Agile and scrum run in fixed sprints with a backlog, planning, and a review at the end. Kanban runs as a continuous flow of cards across columns with limits on work in progress and no fixed sprint boundary. Waterfall and phase-gate run as scheduled stages where one phase depends on the last, which is where timelines and dependencies matter most. Most real teams blend these, so describe your actual week rather than forcing a label.

Your methodology decides which core view the tool must do well. A sprint team needs a backlog and a board that handles sprints and story points. A continuous kanban team needs flexible boards with work-in-progress limits and cares little about heavy gantt features. A scheduled, dependent workflow needs timelines, dependencies, and a gantt view, and a board alone will fight it. Match the tool to the view your team already thinks in, because a tool that forces a new mental model on the team is a tool the team resists.
Watch out for adopting a methodology to suit a tool rather than the reverse. A polished sprint feature can tempt a team that does not actually run sprints into pretending it does, and the ceremony becomes overhead nobody wanted. Describe your real flow first, pick the tool that fits it, and let the methodology stay a description of how you work rather than a costume the software makes you wear. Enter your methodology in the companion so every later step scores against it.
Step 2: List your must-have features
With your workflow mapped, turn it into a short list of features the tool must have, and be ruthless about the word must. Work down from your flow: task and subtask management so work can be broken up and assigned, the primary view your team thinks in, whether that is a board, a list, or a calendar, and the timeline or gantt view if your work is scheduled and dependent. Add reporting and dashboards if you need to answer real questions about progress and workload, and time tracking if you bill by the hour or plan capacity around it. Mark each as a must-have or a nice-to-have, and keep the must-have list to three to five items.
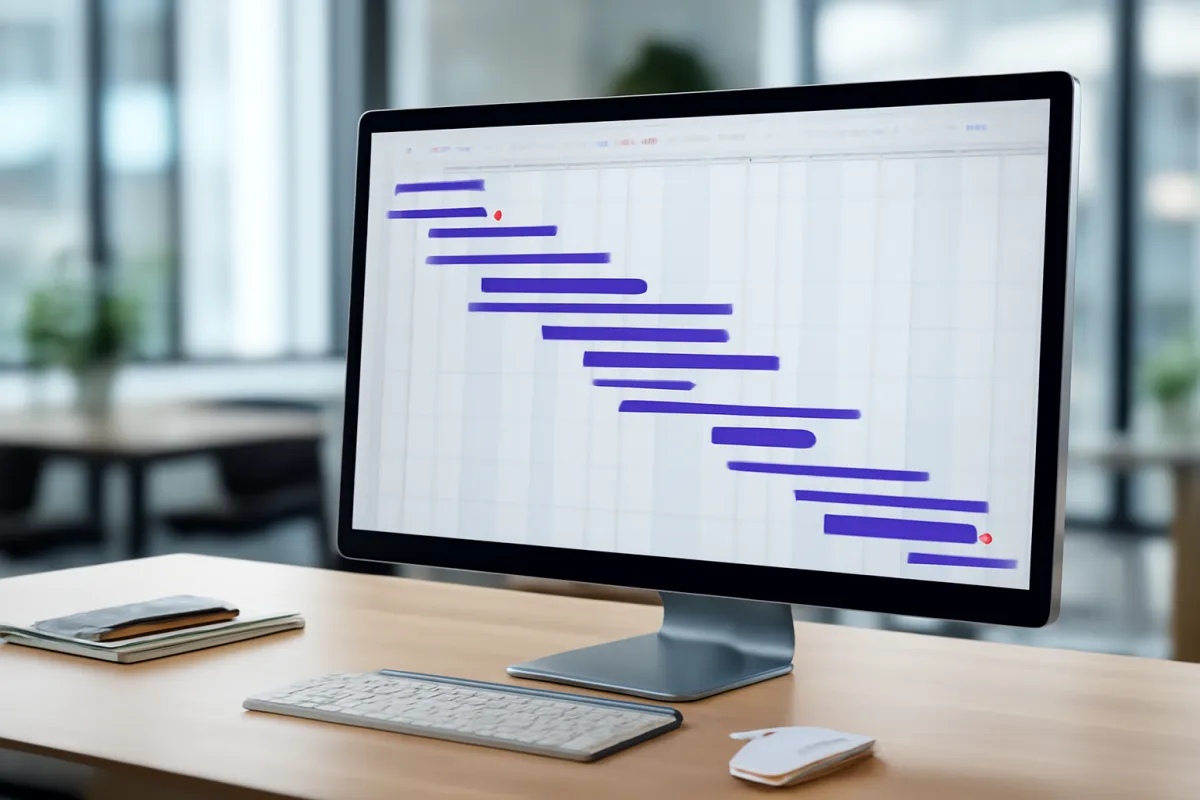
The reason to keep the list short is that features are how vendors sell you a plan a tier above what you need. A tool crowded with automations, portfolios, and resource-management modules looks impressive in a demo and adds real weight to the daily experience, and weight is the enemy of adoption. A simpler tool that does your core views cleanly will beat a heavier one your team has to fight, so treat every nice-to-have as something to leave on the shelf until a real need pulls it down.
Be specific about reporting in particular, because it is the feature most often gated a tier higher than the marketing implies. Write down the exact questions you need the tool to answer: who is overloaded this week, which tasks are late, how a project is tracking against its deadline. Then, in a demo or trial, confirm the tool answers those specific questions in the tier you are pricing, not only in an enterprise plan. Watch out for the feature checklist that rewards quantity. A tool wins by doing your few must-haves well, not by having the most boxes ticked, so score fit to your workflow rather than raw feature count.
Step 3: Set a per-user budget
Project management software is almost always priced per seat, per month, which means your budget is not a single sticker but a number that scales with every person on the team and every hire you make. Start with the team size you settled on before you began, then attach a per-user ceiling you can defend across the whole team. Commonly cited illustrative per-user bands, which move constantly and vary by vendor, put free tiers at zero for small teams, entry plans around $8 to $12 per user each month, professional plans with timelines and reporting around $15 to $25, and enterprise plans with advanced permissions around $30 and up. Treat those as planning ranges, and always confirm the vendor’s current pricing directly, because plan structures and included features change often.
The trap is pricing one seat and forgetting the multiplier. A professional tier at an illustrative $20 per user feels modest until you multiply it across a fifteen-person team and a full year, at which point it is a real line in the budget, and it grows every time you hire. Beyond the per-seat number, two costs sit outside the sticker. Onboarding and setup, especially for a larger team, can be a real one-time expense, and guest or viewer seats and paid add-ons can quietly add to the monthly bill. Our project management cost verdict takes this stack apart in detail, and the shape is worth seeing before you set a ceiling.
The true cost of project management software
Illustrative split of a team's first-year project management cost across per-seat subscription, add-ons and guest seats, and onboarding. Shares sum to 100.
The per-seat subscription is the largest line but not the whole bill. Add-ons, guest seats, and onboarding push the true first-year number above the per-user sticker, which is why the sticker alone is a poor budget.
Watch out for the annual-billing framing. Nearly every tool advertises its lowest per-seat price at the annual rate and charges more monthly, and the pricing page is built so you compare the discounted number without noticing the twelve-month commitment. Set your ceiling against the whole team for a full year, then run your own numbers through the true-cost calculator and the companion here so the budget is a real number, not a hopeful one.
Step 4: Check the integrations you depend on
Project management software does not live alone. It sits in the middle of where your team already communicates, stores documents, and schedules its time, and its value depends heavily on how cleanly it connects to those tools. A project tool that cannot reach your chat app, your document store, or your calendar becomes a separate place your team has to remember to visit, and separate places are the ones people quietly abandon. So before you get attached to any candidate, go back to the current-tools list you wrote before you started and check each tool against it, one connection at a time.
Start with the three that matter most for daily use. Chat integration, so task updates and notifications reach the team where they already talk, is often the difference between a tool people notice and one they forget. Document integration, so files and specs link cleanly to the tasks they belong to, keeps work and its context together. Calendar integration, so deadlines and milestones appear where your team already plans their week, keeps the tool honest about time. Then check any specialist tools your work depends on, a code repository, a design tool, a support desk, or a CRM, and confirm the connection exists and moves the data you actually need.

Watch out for the word integration on a feature page, because it covers a wide range of reality. Some integrations are deep two-way syncs that update both tools automatically; others are a one-way notification or a shallow link that moves a single field. Ask exactly what data flows, in which direction, and how often, and confirm the connection you need is included in the tier you are pricing rather than gated a level higher or metered as an add-on. Note any integration cost as a line item in your first-year budget from Step 3, because a connector you assumed was free can carry its own monthly charge.
Step 5: Weigh ease of use and team adoption
This is the step buyers most often underweight, and it decides whether the whole purchase pays off. A project management tool creates value only when the team actually uses it, and the most capable tool on the market is worth nothing if half the team drifts back to the group chat and the spreadsheet within a month. So weigh ease of use and the adoption it drives as heavily as you weigh features, and treat the daily users, not the buyer, as the people the tool has to please.
Ease of use is not a vague feeling. It is measurable in the pilot: how long it takes a new person to create and find a task, how many clicks a normal daily action costs, and whether people open the tool without being reminded. A tool that people find genuinely easier than the workflow it replaces gets adopted almost on its own. A tool that is more work than the chat thread it is supposed to replace gets abandoned, no matter how powerful, because people route around friction. Bring the actual daily users into the evaluation early, and give real weight to their reaction, because they are the ones who decide whether the tool lives.

Adoption is also something you can set up to win. Start the team on a simple version of the workflow rather than an elaborate one, keep the initial setup minimal, and add structure only once the habit forms. Name an internal owner who answers questions and keeps the boards tidy in the first weeks, because a tidy, obviously useful board pulls people in while a messy one pushes them away. Watch out for buying on capability alone. The tool that wins the feature comparison and loses the adoption contest is the expensive mistake this whole walkthrough exists to prevent, so let the team’s willingness to use it carry real weight in the score.
Step 6: Run a real pilot with a live project
Everything to this point is preparation. The pilot is where you learn the truth, and it only works if it is real. A casual tour of a demo account teaches you almost nothing, because the vendor’s sample project is clean, the sample workflow is theirs, and none of your real complications appear. A real pilot sets up an actual project with your real tasks and runs a genuine piece of work through the tool for a focused stretch of time, with the people who will actually use it.
Structure the pilot around a live project or a real sprint. Create the actual tasks you are working on this week, assign them to the real people, and work in the tool through a genuine cycle: move cards across the board, hit a real deadline, comment where you would normally comment, and pull the report you rely on at the end. A focused week or two is usually enough if the pilot is built around real work rather than a wander through the menus. Put the daily users on it, not just the buyer, and watch whether they open it on their own or wait to be reminded, because that behavior is the single best predictor of adoption. Our software trial walkthrough lays out the full sequence, including probing support and checking the export while you still can.
Watch out for the pilot that quietly rigs itself. Book a decision date before the pilot starts, so it ends in a verdict rather than drifting into a default subscription when the trial converts to paid. Score each finalist on one rubric, using the weighting you set in Step 1, with ease of use and the team’s reaction included, not just the look of the board. And run the pilot on a project that resembles your real work, not the simplest possible one, because a tool can feel pleasant on a trivial task and fall apart on the messy, dependent, multi-person work that fills your actual week. A short, structured pilot on a live project beats a long, aimless trial every time.
Step 7: Check scalability, permissions, support, and data export before committing
Two tools can score identically in a pilot and still cost you very differently over a year, because the pilot mostly tests the product today and barely tests the vendor and the future. Before you decide, check four things the demo will not volunteer: whether the tool scales with your team, whether its permissions match how you need to control access, what support actually looks like when you need it, and how easily you can get your data back out.
Scalability comes first because per-seat pricing makes growth a real cost. Look one stage ahead: if you will double the team, add clients or contractors as guests, or run many projects at once, confirm the tool has a tier that handles it and check what that tier costs, so a growth move does not force a painful migration mid-year. Permissions matter as soon as more than a few people share the tool. Confirm you can control who sees and edits what, keep sensitive projects or client work separate, and give guests limited access without buying them full seats, because the permission model you need often sits a tier higher than the one you priced.
Support is the cost that shows up later, usually at the worst moment. During the pilot, file a genuine support ticket and time the response, because that interaction previews the vendor you will live with, and check what support level your plan includes, since priority help is often gated to higher tiers. Data export and lock-in is the factor teams skip and regret. Ask exactly how you get your tasks, comments, attachments, and full project history out, and in what format, before you ever put a year of work in, because a tool that makes export easy is one you can actually leave. Then decide. Bring your weighted scorecard from Step 1, your whole-team budget from Step 3, your adoption read from Step 5, and your pilot results together, and pick the tool that scores highest on the criteria you set, not the one with the warmest demo. If the price came through a sales conversation, it may be negotiable, and our negotiate-SaaS walkthrough covers that. Start on a monthly or short term where you can, confirm the team actually uses it, then commit. Price the final choice one more time in the true-cost calculator before you sign.
Worked example: a team picks project management software
Consider a small business, a twelve-person marketing agency that runs client projects, mixes scheduled campaign work with continuous requests, and wants everyone off the group chat and the shared spreadsheet, choosing project management software run through all seven steps with illustrative numbers so the process is concrete. Every figure here is illustrative and internally consistent; your own numbers will differ, and current vendor pricing should be confirmed directly.
In Step 1 they map their workflow and find a blend: campaigns run as scheduled, dependent work with real deadlines, while day-to-day client requests flow continuously across a board. That points to a tool with both a solid board and a real timeline view, and away from a pure sprint tool built for software teams. In Step 2 they list must-haves: task and subtask management, a board view, a timeline for campaigns, and reporting that shows who is overloaded and which work is late. Everything else, portfolios and resource modules included, goes on the nice-to-have shelf. In Step 3 they set a budget. A professional tier at an illustrative $18 per user each month across twelve people is the plan floor, but they price the whole team for a full year, add a little onboarding, and allow for a couple of client guest seats, so the real first-year number lands well above the per-seat sticker. They confirm each vendor’s current pricing directly.
In Step 4 they confirm the tool connects to their chat app, their document store, and their calendar, because those are where the team already lives, and they drop one candidate whose calendar link is one-way only. In Step 5 they weigh adoption and put the account managers and designers, the daily users, into the evaluation rather than deciding from the top. In Step 6 they pilot the two survivors for two focused weeks on a real client campaign, with real tasks and real deadlines, and watch who opens the tool without being reminded. One tool the team logs into on its own; the other they keep having to be nudged toward. In Step 7 they check that the next tier handles more guests, confirm the permissions keep client work separate, file a support ticket, and verify a clean export. The choice arrives boring and well-evidenced, which is exactly the goal. Model your own version in the companion on this page.
Common mistakes when choosing project management software
The same handful of mistakes sink most project management software decisions, and all of them come from letting the vendor or the brand set the terms instead of your own workflow.
- Chasing a long feature list. The tool with the most features wins comparison charts and loses daily use, because every extra module adds weight the team has to carry. Match the tool to your few must-have views and leave the rest on the shelf, because a simpler tool people open beats a powerful one they avoid.
- Ignoring adoption. Choosing on capability and assuming the team will follow is the classic expensive mistake, because a tool nobody opens is pure cost. Weigh ease of use and bring the daily users into the decision before you buy, not after the boards go quiet.
- Skipping a real pilot. Choosing on demos and reviews means choosing on the vendor's clean sample project and someone else's workflow. Without a pilot on a live project, with your real tasks and real people, you are guessing, and the guess is locked into an annual plan.
- Forgetting the per-seat multiplier. Pricing one seat and ignoring that every hire adds another line means a budget that quietly grows out from under you. Price the whole team for a full year, and remember that guest seats and add-ons sit outside the sticker.
- Getting locked in. Not checking how data export works before you enter means not knowing how trapped you are if the tool disappoints. Project history accumulates fast, so a tool you cannot leave cleanly is one you will keep paying for long after it stops fitting.
- Buying on brand. The most-advertised tool is optimized for the vendor's growth, not for your twelve-person agency. Use brand recognition to discover candidates, never to make the choice, because fame tells you a company markets well and nothing about whether the tool fits your workflow.
Troubleshooting: what to do when it goes wrong
Even a careful choice runs into trouble. Here are the common failure modes and what to do about each.
Your team will not adopt the new tool. This is the most common and most costly failure, and it is usually about friction rather than the team being difficult. Watch where people route around the tool: if they keep updating each other in chat instead of on the board, the tool is more work than the thing it replaced. Simplify the workflow, cut the required fields to the minimum, and make the board obviously useful at a glance. Name an owner who keeps it tidy and answers questions in the first weeks, and integrate it with the chat app so updates reach people where they already are. If adoption still fails after a genuine, simplified effort, that is real evidence the tool is wrong for the team, not a reason to push harder.
Your team is remote or hybrid. A distributed team leans on the tool more heavily, because it is the shared source of truth that a shared office used to be. Weight asynchronous communication, clear task ownership, and strong chat and document integration more heavily than an in-person team would, and confirm notifications reach people across time zones without becoming noise. In the pilot, test the tool the way a remote team actually works, with updates left as comments rather than said across a desk, because a tool that assumes everyone is in the room will quietly fail a distributed team.

You are hitting free-tier limits. A free tier is a good place to start, and hitting its wall is a signal, not a failure. The usual walls are the user cap, limited history, gated automation, or the advanced views like timelines and dashboards. When a real limit blocks real work, price the paid tier for your whole team before you upgrade, and confirm the specific feature you need is in that tier rather than a level higher. Do not upgrade because a comparison chart lists more; upgrade because a wall is in your way. If the free tier still covers your must-haves, staying on it is a legitimate choice.
You are migrating existing tasks. Moving work from a spreadsheet, a chat thread, or an old tool is a real project, not a toggle. Do not import everything at once, and do not carry over clutter you have been meaning to clear. Clean the source first, move a small, active batch to verify the setup works, and keep the old source available until the team trusts the new tool. Involve the daily users in shaping the boards, because a structure they helped build is one they are far more likely to keep using.
Your project management software checklist
Use this as the save-this asset. Work top to bottom before you commit to any annual plan.
- Mapped your workflow and named your methodology, agile, kanban, waterfall, or the blend you actually run, in your own words.
- Listed three to five true must-have features, the views and functions your workflow needs, with everything else marked nice-to-have.
- Set a per-user budget for the whole team across a full year, not one seat, allowing for guest seats and add-ons, and confirmed current pricing with each vendor.
- Confirmed the integrations you depend on, chat, docs, calendar, and any specialist tool, exist and move the data you need in the tier you are pricing.
- Weighted ease of use and adoption as heavily as features, and brought the daily users into the decision.
- Ran a real pilot on a live project, with real tasks and the real people, and watched who opened it without being reminded.
- Scored finalists on one rubric using your weighting, with the team's reaction included, not just the look of the board.
- Checked scalability and permissions for where the team is going, including guests and sensitive-project access.
- Checked support and confirmed a clean export path, and where the price came through a sales conversation, asked what is negotiable.
- Started on a short term where possible, confirmed the team actually uses it, then committed.
How the seven criteria trade off against each other
The seven steps are not equal, and part of choosing well is knowing which trade-offs to accept. The weighting below puts fit to your workflow and team adoption at the top for a reason: project management software creates value only when the team uses it, so a tool that dazzles on features but does not match how your team works, or that the team will not open, is worth little in practice. When two finalists are close, break the tie on the pilot behavior and the team’s reaction, not on the feature that impressed you in the demo.
How to weight project management software criteria
An illustrative starting weighting, out of 100, for scoring project management software candidates. Adjust the numbers to your own situation before you score anything.
Widths are drawn from each weight against the largest one (30). Fit and adoption together carry more than half the decision here, because project management software that does not match your workflow or that the team will not open fails at the one job that matters most.
Cost and capability pull against each other in a predictable way. The tier that unlocks timelines, dashboards, or the permission controls you need also raises the per-seat price across the whole team. When you hit that fork, ask whether the gated capability is a genuine must-have from Step 2 or a nice-to-have that has crept up the list. If it is a nice-to-have, stay on the lower tier and revisit later; if it is a real must-have, price it honestly across the whole team from Step 3 before you decide. Capability and simplicity trade off too: the most powerful tool is often the heaviest to use, and weight is what kills adoption, so a tool that does your few must-haves cleanly usually beats one that does everything at the cost of daily friction. Integrations and portability trade against convenience: the most tightly integrated platform can also accumulate the stickiest history, which is why you insist on a clean export path in Step 7 even for the tool you love. A good project setup is easy to open every day and still easy to walk away from at renewal, and holding both requirements at once is what keeps a convenient tool from becoming a trap.
When to revisit your project management software choice
A project management software decision is not permanent, and treating it as final is how teams end up paying for a tool that stopped fitting stages ago. Put a reminder on the calendar to reassess at renewal, when you have a full year of real use and a clear memory of what the team actually opened and what quietly went unused. The questions are simple: did the team adopt it, did it still match how you work, and has the per-seat cost stayed matched to the value it delivers?
Reassess sooner if any of three things happen. The team grows or shrinks sharply, because per-seat pricing and the permission model both shift with headcount, and a tool priced for a small team can become a large line as you hire. Your work changes shape, moving from continuous requests to scheduled projects or the reverse, because a tool mapped to your old workflow becomes friction against the new one. Or adoption slips, the boards go quiet and the group chat fills back up, which is the clearest signal of all that the fit has broken. Revisiting on a schedule, with the same criteria you used to choose, keeps the decision honest and keeps you from defaulting into a renewal you would not choose fresh. Run the current plan through the true-cost calculator each time, so the renewal is a decision rather than a habit.
The bottom line
Choosing project management software is not a matter of finding the best product. It is a matter of finding the best fit, and fit only reveals itself when you run the decision from your own workflow outward: how your team works, the few features you truly need, a budget priced across the whole team, the integrations you depend on, the ease of use that drives adoption, and your real project run through a pilot. The seven steps here are simply the order that keeps the vendor and the brand from setting your criteria for you. Map your workflow, list your must-haves, set a per-user budget, check the integrations, weigh adoption, pilot on a live project, and weigh scalability, permissions, support, and export before you decide. Do it in that order and the choice arrives calm and well-evidenced instead of loud and abandoned a month later. The demo belongs to the vendor. The decision, made this way, and above all the question of whether your team will actually open the tool every morning, belongs entirely to you. Price your own choice in the true-cost calculator and the companion before you sign a thing.
VetLoft works for buyers and never for vendors, and this verdict reflects that: it is educational material, not procurement, legal, or financial advice, and no step or figure here is a rule for your specific team. The right project management software depends on your workflow, your team size, the tools you already use, and the deal on the table, all of which shift over time. Because vendor pricing, plans, features, and trial terms change frequently, every number in these pages is illustrative, so confirm the current figures with the vendor directly before any seat or signature is committed.
Frequently asked questions
How do I choose the right project management software for my team?
Start from how your team actually works, not from a vendor feature list. Write down your methodology, agile, kanban, or waterfall, the size of the team, and the tools you already use every day. Then list the three to five features you truly need, set a per-user budget for the whole first year rather than the sticker, and shortlist two or three tools that fit your workflow. Run a real pilot on a live project before you commit, and put the people who will use it daily on the pilot, not just the person buying. The right project management software is the one your team will actually open every morning, which is rarely the one with the longest feature list.
What features should I look for in project management software?
Look for the features your workflow needs, in roughly this order: task and subtask management, the board or list view your team thinks in, timelines or a gantt view if you run scheduled work, reporting and dashboards that answer the questions you actually ask, and time tracking if you bill or plan by hours. Beyond those, weigh integrations with your chat, docs, and calendar, and the permission controls you need as the team grows. Keep the must-have list short. Long feature lists mostly serve the vendor's sales page, and a tool crowded with features your team ignores is harder to adopt than a simpler one that fits.
How much does project management software cost per user?
Commonly cited illustrative per-user bands, which move constantly and vary by vendor and plan: free tiers sit at zero for small teams, entry plans commonly land around $8 to $12 per user each month, professional plans with timelines and reporting around $15 to $25, and enterprise plans with advanced permissions and controls around $30 and up. Those are headline subscription numbers only, billed per seat, so the monthly total scales with every person you add. Onboarding, paid add-ons, and guest or viewer seats sit outside that number and can push the real first-year cost well above the per-user sticker, so price the whole team and confirm the vendor's current pricing directly. Our project management cost verdict takes the full stack apart.
Should I use a free project management tool or pay for one?
For a small team with a simple workflow, a free tier is often a genuinely good starting point, and starting free lets you learn what you actually need before you pay. Free tiers usually cap the number of users, the history you can see, the automation you can run, or the advanced views like timelines and dashboards. You outgrow them when you hit one of those walls: the team passes the user cap, you need reporting the free tier gates, or you need the permission controls to keep sensitive projects separate. Move to a paid tier when a real limit blocks real work, not because a comparison chart says the paid plan has more. Price the paid tier for your whole team before you switch.
How long should I trial project management software before buying?
Long enough to run a real project through it, which usually means a focused week or two on a live piece of work rather than a tour of the demo. Set up an actual project with your real tasks, invite the people who will use it daily, and work in it for a genuine sprint or milestone: create and assign tasks, move them across the board, hit a deadline, and pull the report you rely on. Book a decision date before the pilot starts so it ends in a verdict instead of drifting into a default subscription. Our software trial walkthrough lays out the full sequence, including probing support and checking the export before you commit.
What is the best project management software for a small team?
There is no single best project management software, only the best fit for your workflow, your methodology, and how your team likes to work, which is why brand hype is a poor shortlist filter. A small team running loose, continuous work is often well served by a simple board tool or a free tier. A team running sprints needs backlog and sprint views. A team delivering scheduled, dependent work needs timelines and a gantt view. The honest answer is to shortlist by fit to your workflow, pilot the finalists on a live project, and let the team that has to use it every day help decide, not the biggest name on the review site.
How do I get my team to actually adopt new project management software?
Adoption is won before you buy, not after, so weigh ease of use and involve the daily users in the decision from the start. The tools that get adopted are the ones people find genuinely easier than the spreadsheet or chat thread they replace, so pilot on a real project and watch whether the team opens it without being reminded. Pick a simple workflow to start, keep the setup minimal, and add structure only once the habit forms. Name an internal owner who answers questions and keeps the boards tidy in the first weeks. A tool nobody opens is a pure cost, no matter how capable it is, so treat adoption as a real selection criterion rather than an afterthought.
How do I avoid choosing the wrong project management software?
The common wrong turns are buying on brand, chasing a long feature list, ignoring whether the team will adopt it, skipping a real pilot, and forgetting that per-seat pricing scales with every hire. All of them come from letting the vendor set the criteria. You avoid them by writing your workflow and must-have features down before you look at any product, pricing the whole team rather than one seat, weighting adoption as heavily as capability, and piloting the finalists on a live project before you commit. Project management software chosen this way can still need adjusting, but it rarely ends up as an expensive tool the team quietly abandons, which is the outcome that matters most.